Wednesday 10 September 2014

More Terrain - a Building!

Recently Norm Smith has released two Stalingrad scenarios and some "how to" articles on scenery building for Tigers at Minsk. As a result of this I realised that the buildings I showed in the previous post simply weren't going to cut the mustard, so I decided to do something about that.

Buying resin or laser cut mdf terrain is beyond my meager budget. Building it myself (as Norm did) would have been stretching my modeling abilities and somewhat time consuming. So I looked around for a quick, cheap alternative.

Enter Dave Graffam Models and his excellent range of papercraft buildings and terrain. For the almost unbelievable price of 91p I bought his "Snipers Wall" set.

What you get from DGM is a pdf with "layers" allowing you to customize the look of the building templates before you print them out. The standard size is tailored for 28 to 30mm scale but a handy shrink to scale chart is proved. To get "N" scale (or 10mm) required that I print with a 66% reduction I.E. the templates were reduced down to 34% of their original size.

Having printed, cut out, then glued together the model I stuck it down (using doubled sided tape) to a double sized hex template and textured the base. All this took about four hours spread over two days to allow for glue drying.

Here is the finished result:


Monday 23 June 2014

Terrain and Board Finished!

Here are the finished hex tiles and swap-outs.

Firstly, the board.


I picked up a pin board from Amazon, it cost around £12 including delivery charges and it is 2ft by 3ft in size. It is not robustly constructed (though I see no reason why that would be an issue) but it is doubled sided. The other side being very thin cork.

Next up are the swap-outs.

Firstly the hills, I have made one large and two small hills I'll have to add a couple of two hex medium sized hills in the future.


Marsh/Rough Ground.


Destroyed Woodland.


These feature shell holes from M.Y. Miniatures and the "Deadfall" set from Woodland Scenics. I mixed PVA and brown paint to line the bottom of the craters and then gloss vanished the hole to give it a wet/slick look. The brown staining around the crater edges was done with watered down Basetex.

Stream/River.


I made this using the same techniques I have already documented for the marshes. The bank is made from chippings from the Warhammer 40K basing kit.

Buildings.


I had these buildings lying around in my collection. I've overdone the roofs a bit but I will correct that at a later date.

Winterised Trees.


I nicked my partner's hair spray for this, gave the trees a good going over with it then shook on some fine snow powder from Woodland Scenics, immediately after shaking the snow on each tree was hair sprayed again to fix the snow in place.

Despite using the ridiculously expensive though recommended Hob-e-tac glue (£7 for 2oz!) my trees are still molting weeks after I first created them. Here is a picture of what has fallen off since applying the snow.


All this will get stuck back on with cheap superglue which does a far better job that Hob-e-tac.

Having got together what I hope will be enough terrain to get a good start I am now turning my attention to acquiring and painting some figures. 

Monday 9 June 2014

Work In Progress

This project was started in response to the series of articles and the free rules entitled "Tigers at Minsk" by Norm Smith. Norm's blog "Battlefields and Warriors" can be found here:

The look of the board I am going for is early Winter on the Eastern Front, October/November time, so cold/frosty with light snow and ice. I am looking do battles connected to the Defense of Moscow 1941.

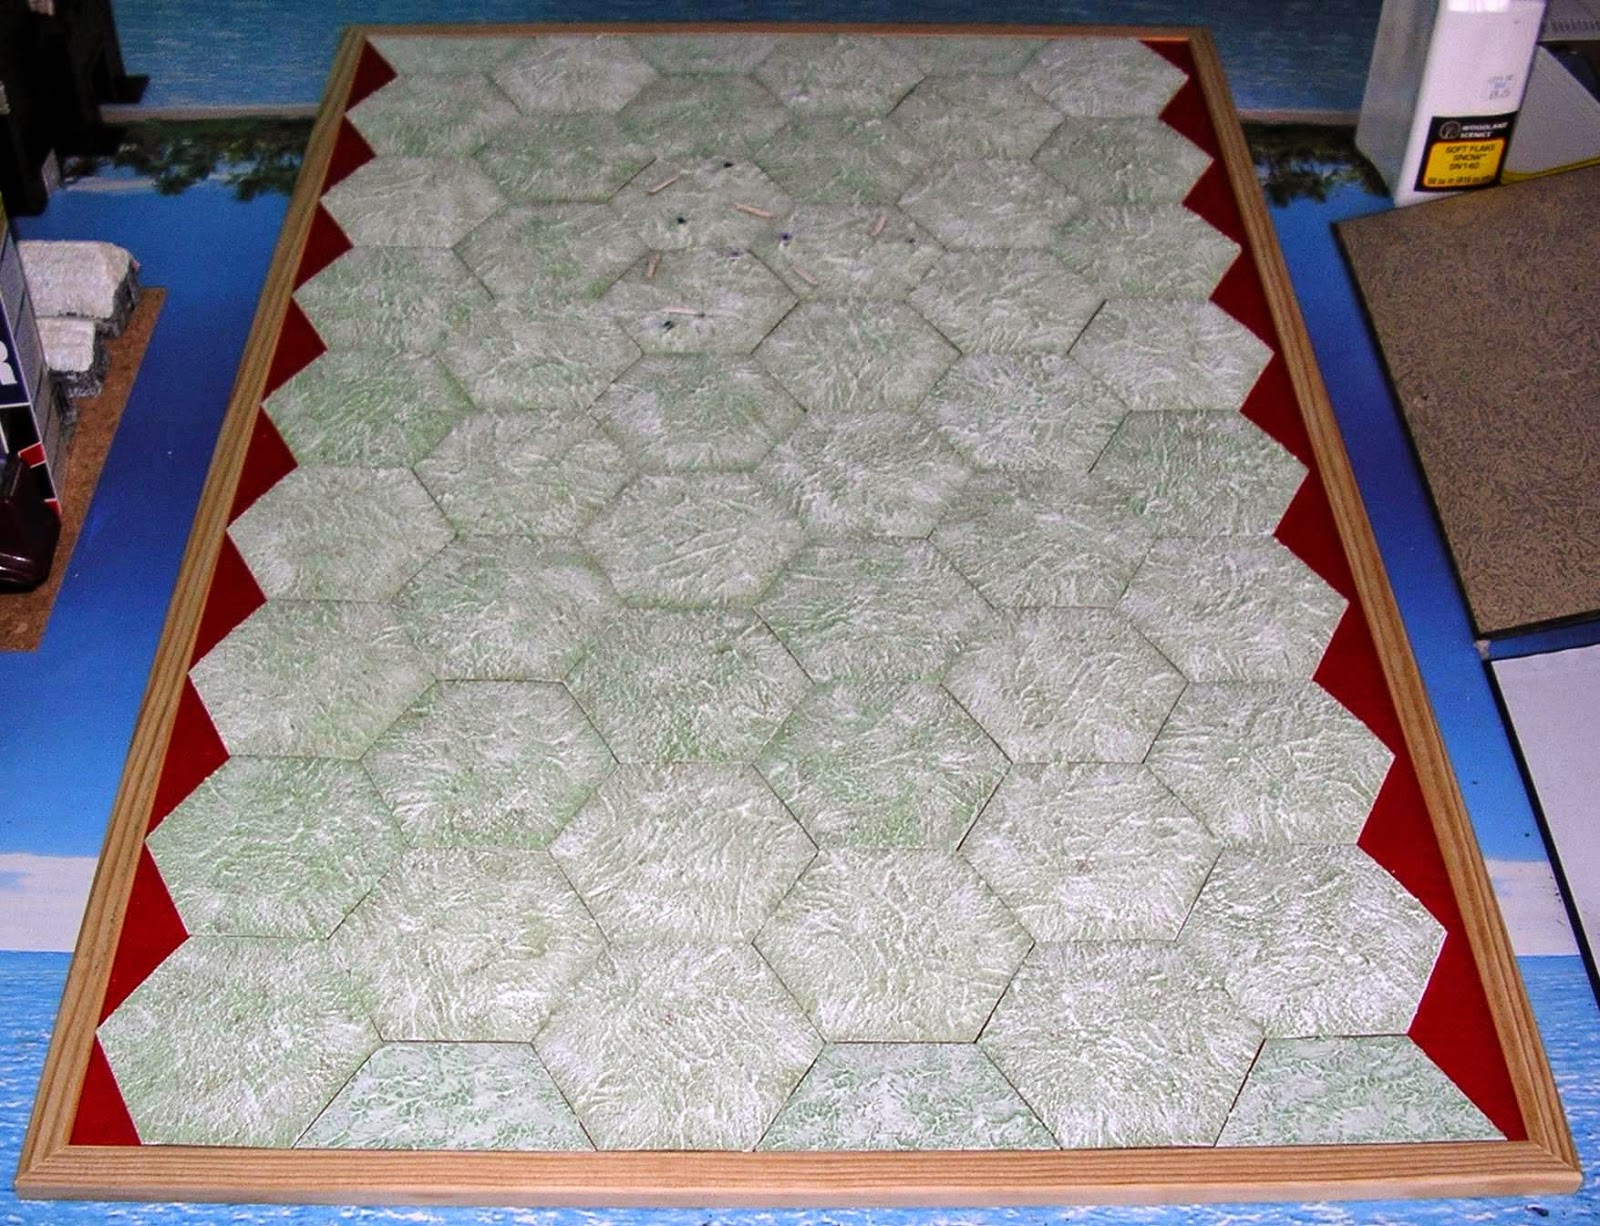
Here is a view of my hex board (sorry in advance for my poor camera work).


As should be evident I did the filla paste in batches and have created, more by accident than design, a patchwork quilt effect of hexes which I very much like the look of.

The colour isn't quite right on my camera, those half hexes are not as light as they appear.

The brown speckling came through during the drying process and has given a mud/green effect that was quite unintentional but welcome never-the-less.


Moving on, here is the large hill. A different (cheaper) filla paste was used for textural effect.


As you can see I am planning on putting a curving valley through the hills.


Next up are some marsh/rough ground swap outs.


The different (cheaper) filla paste was again used for textural effect. The brown stones are from the garden, the grey from a Warhammer 40K basing kit.

The water effect was created by first cutting to shape and then painting very thin plasticard a porcelain blue colour. When dry dark blue ink was applied to the middle of the cut out and dark green ink to the outer edges, these were swirled together a bit for good measure. When dry a coat of gloss varnish was put over the top (sourced from GW). Finally, a piece of blister packaging was cut to match each bit of plasticard, a couple of blobs of superglue were applied and left to dry to give air pocket effects and then it was superglued over the varnished cut out.


To give you an idea of what I am aiming for as an eventual look to my games, here is a patrol of T34 tanks and a BT7 from Katakov's 4th Tank Brigade somewhere near Mtensk, October 1941.


There is a lot of work left to do, for instance I want to draw together the different greens a little by giving all the tiles a light dusting of "snow". I'd also like to add some clump foliage to many of the plain tiles and to Winterise (is that even a word?) the trees and also get some Pine trees so I can bulk out the woods a bit.

Anyway, I hope you enjoyed having a look.